Table of Contents
ToggleA powered subwoofer is the difference between hearing an explosion in a movie and feeling it rumble through your chest. It’s the foundation of any home theater worth its HDMI cables. Unlike passive subwoofers that need an external amplifier, a powered sub has a built-in amp matched to the driver, making installation straightforward and performance predictable. Whether you’re upgrading a basic soundbar or completing a full 5.1 surround system, understanding powered subwoofer specs, placement, and tuning will help you get clean, room-shaking bass without muddy overtones or neighbor complaints.
Key Takeaways
- A powered subwoofer combines a low-frequency driver with a built-in amplifier, eliminating the need for external amps and making installation straightforward for your home theater system.
- Choose a powered subwoofer with at least 200–300 watts RMS for small to medium rooms, with driver sizes ranging from 10″ to 15″ and frequency response extending down to 25 Hz for optimal bass impact.
- Proper placement is critical—the “subwoofer crawl” technique and offset positioning away from wall centers will significantly improve bass quality and eliminate room-mode issues.
- Set your receiver’s crossover frequency to 80 Hz for most setups, calibrate the subwoofer’s volume to match your main speakers at 75 dB SPL, and adjust phase control for seamless integration.
- Use isolation pads and late-night EQ modes to prevent bass-related neighbor complaints and vibration issues, especially in apartments or townhouses.
- Powered subwoofers transform home theater into an immersive experience by extending bass to frequencies you feel rather than just hear, delivering clean, controlled low-frequency effects without muddy overtones.
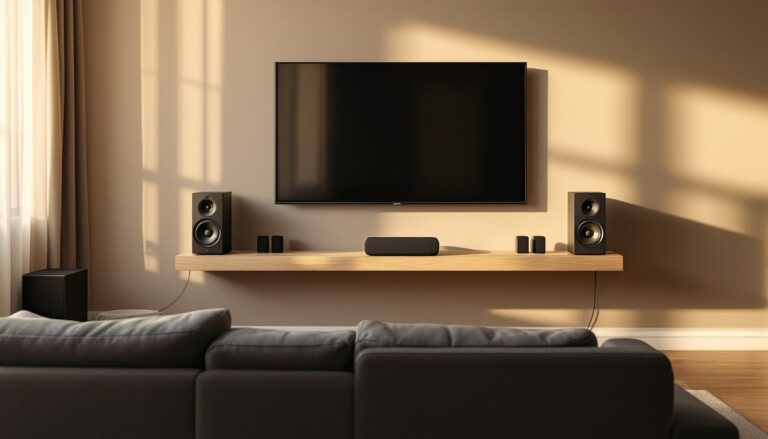
What Is a Powered Subwoofer and Why Does Your Home Theater Need One?
A powered subwoofer (also called an active subwoofer) combines a low-frequency driver (the speaker cone) with an onboard amplifier in a single cabinet. The amp is engineered specifically for the driver it’s paired with, so you don’t have to worry about impedance matching or power handling, it’s plug-and-play once you run the signal cable.
Most home theater receivers and soundbars include a dedicated subwoofer output (usually labeled “Sub Out” or “LFE”), which sends only the low-frequency effects channel to the sub. This frees your main speakers from trying to reproduce deep bass they weren’t designed for, letting them focus on mids and highs. The result is clearer dialogue, tighter imaging, and bass that extends down to 20 Hz or lower, frequencies you feel as much as hear.
Without a subwoofer, even high-quality bookshelf or tower speakers will miss the bottom octave of movie soundtracks, game audio, and music. Explosions sound thin, car engines lack weight, and orchestral bass drums lose impact. A powered sub fills that gap, and because it’s self-amplified, you can place it where it sounds best (more on that later) without worrying about running a separate power amp.
Key Features to Look for in a Powered Home Theater Subwoofer
Not all powered subs are created equal. Here’s what separates a budget thumper from a sub that delivers accurate, controlled bass.
Wattage and Power Output
RMS wattage (continuous power) matters more than peak wattage. A sub rated at 200 watts RMS will outperform one claiming 500 watts peak if the latter’s RMS is only 150 watts. For a small to medium room (up to 2,500 cubic feet), look for at least 200–300 watts RMS. Larger rooms or open-concept spaces benefit from 400+ watts.
Power isn’t everything, amplifier quality and cabinet design play huge roles, but underpowered subs distort at higher volumes and can’t produce clean output below 30 Hz. If you’re serious about home theater, don’t skimp here.
Driver Size and Frequency Response
Driver diameter (measured in inches) affects how much air the sub can move. Common sizes are 10″, 12″, and 15″. Bigger drivers generally produce deeper bass with less effort, but a well-designed 10″ sub in a ported cabinet can outperform a cheap 12″ sealed model.
Frequency response tells you the range the sub can reproduce, typically listed as something like “25–200 Hz ±3 dB.” For home theater, you want extension down to at least 25 Hz: action movies and modern game soundtracks have plenty of content below 30 Hz. The upper limit (usually 120–200 Hz) isn’t critical since you’ll set a crossover point in your receiver (more on that in the calibration section).
Also consider cabinet type: sealed (acoustic suspension) subs deliver tight, accurate bass ideal for music, while ported (bass reflex) designs go louder and deeper, perfect for movies. Ported subs are generally the better pick for home theater, though they’re bulkier.
How to Choose the Right Powered Subwoofer for Your Space
Room size is the single biggest factor. Multiply length × width × ceiling height to get cubic footage. A 12″ sub with 300 watts RMS will pressurize a 1,500-cubic-foot room just fine but will struggle in a 4,000-cubic-foot open layout.
For small rooms (under 1,500 cu. ft.), a 10″ sub with 200+ watts RMS is plenty. Medium rooms (1,500–3,000 cu. ft.) benefit from a 12″ driver and 300+ watts. Large or open-concept spaces need 12″–15″ drivers with 400+ watts, or consider dual subs for even bass distribution (a single sub can create peaks and nulls due to room modes).
Budget matters, but don’t chase the cheapest option. Subwoofers under $200 often have boomy, one-note bass and flimsy cabinets that rattle. Expect to spend $300–$600 for a quality powered sub that’ll last. High-end models from SVS, Hsu Research, and Rythmik run $700–$1,500+ but deliver true reference-level performance. According to multiple roundups of top-performing models, spending in the mid-tier range usually offers the best value for home theater enthusiasts.
Also check input options. Most subs use a single RCA (LFE) input, but some include stereo RCA or speaker-level inputs for flexibility if your receiver lacks a dedicated sub output. Wireless subwoofer kits exist but can introduce latency, stick with a cable if possible.
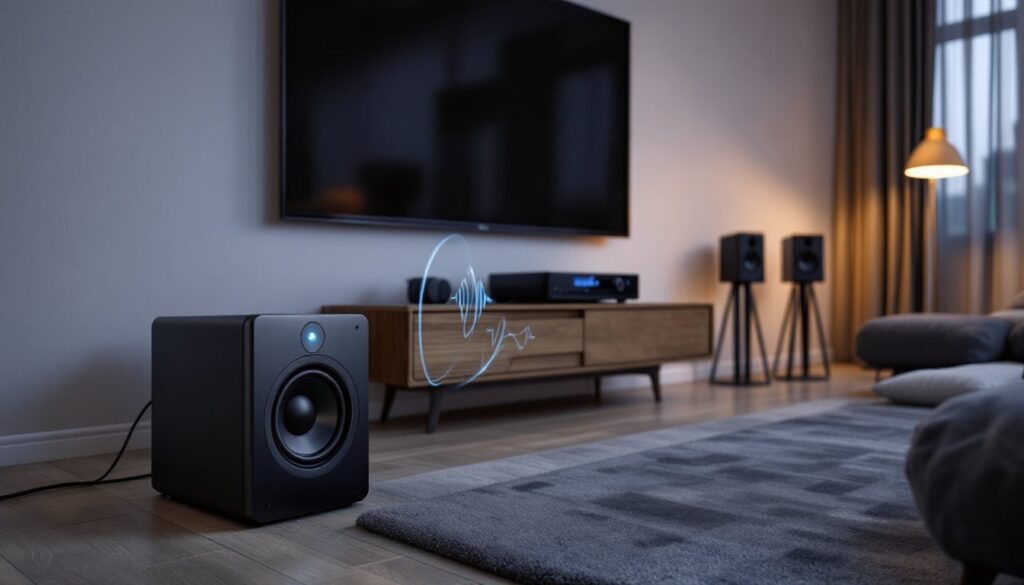
Setting Up Your Powered Subwoofer: Placement and Installation Tips
Placement has a massive impact on bass quality. Low frequencies are omnidirectional, so you can’t always tell where the sub is, but room boundaries and furniture create peaks and dips at different frequencies. Here’s how to find the sweet spot:
-
Start with the front wall. Place the sub near your front left or right speaker, a few feet from the corner. Corners amplify bass (boundary gain) but can cause boominess. Pulling the sub 1–2 feet off the wall tightens response.
-
Try the “subwoofer crawl.” Put the sub in your main listening seat, play bass-heavy content, then crawl around the room’s perimeter on your hands and knees. Where the bass sounds best to your ears, place the sub. It sounds silly, but it works.
-
Avoid dead center on a wall. This position often creates the worst room modes (standing waves). Offset the sub a few feet to one side.
-
Keep it away from obstacles. Don’t shove it behind a couch or inside a cabinet. The port (if ported) needs clearance, typically 3–6 inches from the wall.
Installation is simple: run a subwoofer cable (heavy-duty RCA or XLR if your sub has balanced inputs) from your receiver’s “Sub Out” to the sub’s LFE input. Use at least a shielded 18 AWG cable: cheap thin cables can pick up interference. Plug the sub into a surge protector, not directly into a wall outlet.
If your room has multiple subs, place them asymmetrically (e.g., front left and rear right) to smooth out bass response. According to tests by several audio experts, dual subs significantly reduce room mode issues and improve bass consistency across seating positions.
Safety note: Subwoofer cabinets are heavy, often 40–70 lbs. Get help moving them, and don’t place them where kids or pets can knock them over. Use furniture straps if needed.
Calibrating and Fine-Tuning Your Subwoofer for Optimal Performance
Placement gets you 80% of the way there. Calibration closes the gap.
Start with your receiver’s auto-calibration feature (Audyssey, YPAO, Dirac, etc.). These systems use a microphone to measure speaker distances, set levels, and apply EQ. Run the calibration from your primary seating position, then check the results. The sub’s crossover frequency should be set to 80 Hz in most cases, this is the point where your receiver hands off low frequencies to the sub. If your main speakers are small bookshelf models, you might go to 100 Hz. If you have large towers with deep bass extension, 60–70 Hz works.
Volume (gain) on the sub itself should be set so the sub blends seamlessly with your mains. A common mistake is cranking the sub too high, which makes bass boomy and disconnected. Use an SPL meter (smartphone apps work) to match the sub’s output to your mains at the listening position, aim for 75 dB SPL from both when playing test tones.
Phase control (0° or 180°) adjusts the timing between the sub and mains. If bass sounds thin or hollow, flip the phase switch and listen again. In some cases, a continuously variable phase control (0–180°) lets you dial in the exact sweet spot.
Some powered subs include onboard EQ or DSP. If yours has a low-pass filter knob, set it to its highest setting (or bypass) and let your receiver handle the crossover, double-filtering muddies the sound. If the sub has a room mode correction feature (like SVS’s app-based tuning), use it to tame peaks at specific frequencies.
Finally, play familiar content, movie scenes with deep bass, music with kick drums and synth bass, and fine-tune by ear. The sub should feel like an extension of your mains, not a separate effect. If dialogue has a chesty boom, lower the crossover or reduce the sub’s level. If you’re not feeling impact during action scenes, nudge the gain up slightly. Many expert-tested setups emphasize that proper calibration separates mediocre bass from truly immersive low-frequency performance.
A note on neighbors: Bass travels through walls and floors more than any other frequency. If you’re in an apartment or townhouse, consider a subwoofer isolation pad (dense foam or rubber) under the cabinet to decouple it from the floor. You can also set a low-pass filter or nighttime EQ mode in your receiver to roll off the deepest frequencies during late-night viewing. It’s better to be courteous than to deal with noise complaints, or worse, someone calling code enforcement over vibration issues.
Once dialed in, a quality powered subwoofer transforms your home theater from a TV with speakers into a visceral experience that rivals commercial cinemas. The investment in time and a decent sub pays off every time you cue up an action flick or settle in for a gaming session.