Table of Contents
ToggleBuilding a dedicated home theater isn’t just about mounting a TV and plugging in speakers anymore. Modern systems integrate 4K projectors, immersive audio arrays, smart home controls, and acoustic treatments that transform a spare room into a cinema-quality experience. Whether hiring a professional or tackling it yourself, understanding what’s involved, from running conduit behind walls to calibrating Dolby Atmos speakers, helps homeowners make informed decisions. The stakes are higher than most DIY projects: a botched AV installation can mean rewiring drywall, blown equipment, or a system that never quite sounds right. This guide breaks down what home theater builders actually do, when to hire one, and when a skilled DIYer can handle the job.
Key Takeaways
- Professional home theater builders handle complex tasks like acoustic design, electrical permits, speaker calibration, and smart home integration that DIYers typically can’t manage safely or effectively.
- A home theater builder evaluates room dimensions, calculates optimal viewing distances and speaker angles, and designs acoustic treatments to separate professional installations from amateur setups.
- Basic 5.1 surround systems start around $5,000-$8,000 in equipment with installation adding $1,500-$3,000, while mid-range and high-end theaters range from $20,000 to $150,000+ depending on complexity and automation features.
- DIYers can successfully handle surface-mounted speakers, cable runs in unfinished spaces, and acoustic panel construction, but should avoid ceiling projector work, electrical upgrades, and system calibration without proper training.
- When selecting a home theater builder, verify CEDIA certification, review portfolio projects matching your budget, request itemized proposals, and confirm warranty terms and service response times before hiring.
- System calibration using SPL meters and room correction software transforms hardware into a cohesive experience by setting uniform channel levels and applying EQ curves to compensate for room acoustics.
Why Hire a Home Theater Builder vs. DIY Installation?
Professional home theater builders bring specialized knowledge that goes beyond consumer electronics. They understand acoustic principles, calculate reverberation times for room treatments, and know which wall cavities can hide speaker wire without violating fire codes. Most municipalities require permits for electrical work exceeding basic device replacement, running new circuits for amplifiers or installing recessed speakers often falls under NEC jurisdiction.
A builder also prevents costly mistakes. Mounting a 75-pound projector to ceiling joists requires finding solid framing, not just drywall anchors. They’ll spec the right HDMI cable gauge for runs over 25 feet (active cables or fiber optic for lengths beyond 50 feet) and plan conduit pathways before drywall goes up. Integration with existing smart home systems, syncing lighting with movie playback or programming universal remotes, requires knowledge of Control4, Crestron, or Savant protocols that most DIYers haven’t encountered.
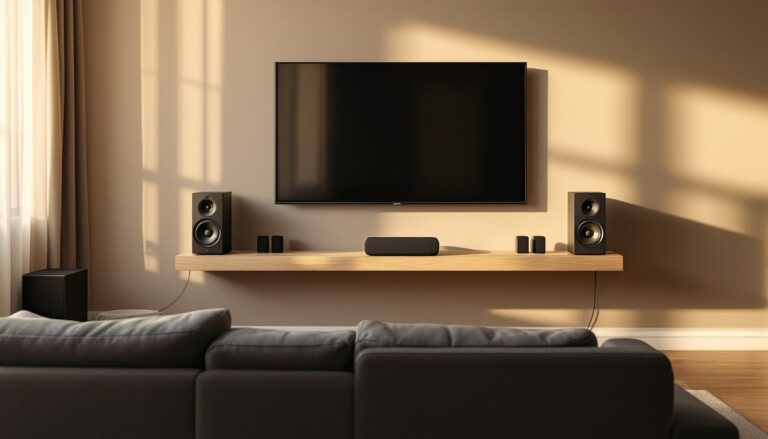
The DIY route makes sense for simpler setups: wall-mounting a TV, connecting a soundbar, or installing basic 5.1 surround with visible speaker wire. But multi-zone audio, in-wall speakers, or projector installations with motorized screens quickly escalate in complexity. If the project involves opening walls, running new electrical, or equipment exceeding $5,000, professional installation protects both the investment and the home’s structural integrity.
What Does a Home Theater Builder Actually Do?
Design and Space Planning
Home theater builders start with room assessment: measuring dimensions, identifying structural elements, and evaluating ambient light conditions. They calculate optimal viewing distances (for a 120-inch screen, seating should sit 10-15 feet back for 4K content) and speaker placement angles (front L/R speakers at 22-30 degrees from center, surrounds at 90-110 degrees for 5.1 systems).
Acoustic treatment planning separates amateur setups from professional ones. Builders identify first reflection points where sound bounces off walls before reaching listeners, then specify absorption panels or diffusers. They’ll recommend bass traps for corners where low frequencies accumulate and calculate room modes, standing wave frequencies that cause uneven bass response. Carpet, heavy curtains, and upholstered seating all factor into the acoustic equation.
Lighting design matters more than most homeowners expect. Builders install dimmable LED fixtures on separate circuits, avoiding glare on screens while providing enough illumination for safe movement. Sconces with backlight bias reduce eye strain during viewing. Some integrate fiber optic star ceilings or LED strip accents controlled through the same automation system as the AV gear.
Equipment Selection and Integration
Builders match components to room characteristics and budget. A 12×16-foot room doesn’t need the same amplifier headroom as a 20×25-foot space. They’ll specify receiver wattage based on speaker sensitivity ratings (85dB speakers need more power than 92dB models) and room volume calculations.
Projector selection involves understanding throw ratios, lumens requirements for ambient light rejection screens, and lens shift capabilities for non-centered mounting positions. A 0.65:1 throw ratio ultra-short-throw projector mounts inches from the screen, while a 1.5:1 long-throw model requires ceiling mounting 12+ feet back for a 100-inch image. Builders know which scenarios suit each type.
Cable infrastructure planning happens before construction begins. In-wall rated CL3 speaker wire, HDMI conduit with pull strings for future upgrades, and dedicated 20-amp circuits for amplifiers all get mapped. Experienced builders leave service loops, extra cable coiled behind equipment racks, for future adjustments. They terminate connections with banana plugs or spade connectors rather than bare wire, ensuring reliable contact and easier troubleshooting.
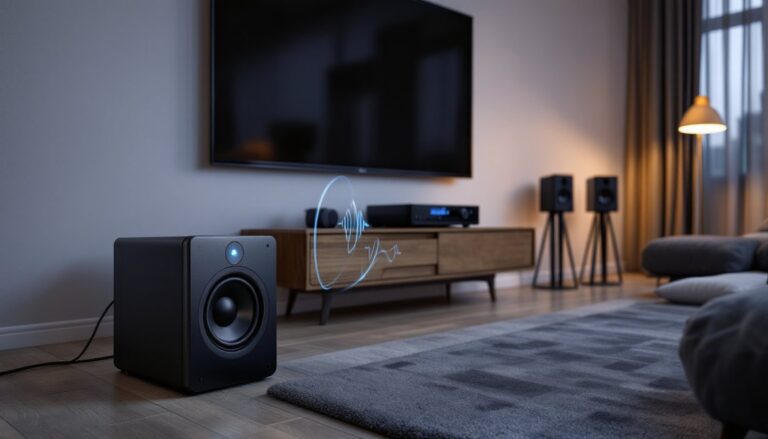
System calibration transforms hardware into a cohesive experience. Using SPL meters and test tones, builders set channel levels so all speakers output uniform volume. They run room correction software (Audyssey, Dirac Live, or YPAO) that measures frequency response at multiple listening positions and applies EQ curves to compensate for room acoustics. Video calibration involves adjusting grayscale balance, gamma curves, and color saturation using test patterns, work that requires colorimeters and hours of fine-tuning.
How to Choose the Right Home Theater Builder
Start with credentials. CEDIA (Custom Electronic Design & Installation Association) certification indicates formal training in residential AV systems. Levels range from Installer to Designer to higher specialist tiers. While not legally required, certification demonstrates knowledge of current standards and best practices.
Review portfolio projects similar in scope and budget to yours. A builder specializing in $100,000+ installations might not suit a $15,000 basement conversion. Ask to see finished rooms in person if possible, photos don’t reveal poor wire management behind equipment or acoustic treatments that look DIY.
Request detailed proposals breaking down labor versus materials. Reputable builders itemize components (receivers, speakers, screens, mounts) separately from installation tasks (wire pulling, calibration, programming). This transparency allows homeowners to comparison shop specific gear while evaluating installation pricing. Many smart home integrations now connect through platforms reviewed on CNET, which helps homeowners verify recommended equipment meets current standards.
Check references and recent projects. Technology evolves quickly, a builder with 2015 credentials but no recent Dolby Atmos or 8K installations might lack current expertise. Ask references specific questions: Did calibration happen on schedule? Does the remote actually control everything as promised? Were change orders reasonable or excessive?
Clarify warranty and service terms upfront. Equipment typically carries manufacturer warranties, but installation labor should include a minimum 1-year guarantee on workmanship. Understand response times for service calls, a $40,000 system loses value fast if the builder ghosts after final payment.
Average Costs for Professional Home Theater Installation
Professional home theater costs break down into equipment and labor categories. A basic 5.1 surround system with quality components (receiver, five speakers, subwoofer, TV or projector/screen) starts around $5,000-$8,000 for equipment. Professional installation adds $1,500-$3,000 depending on room complexity and whether walls need opening for in-wall speakers.
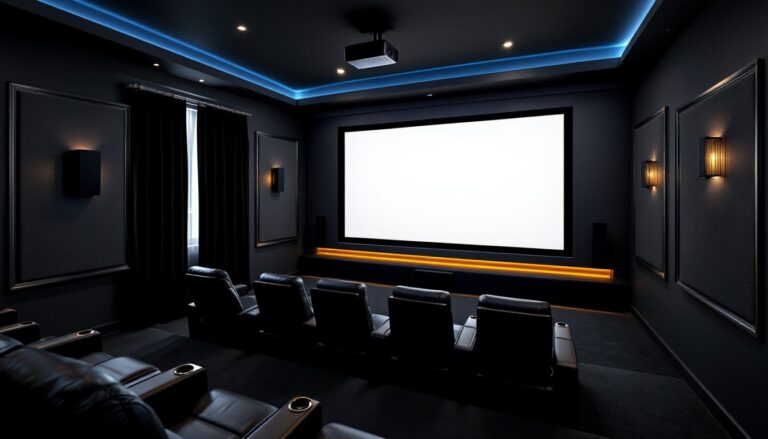
Mid-range dedicated theaters ($20,000-$40,000) typically include 7.1 or Atmos configurations with in-ceiling speakers, acoustic treatments, motorized screen with 4K projector, tiered seating, and smart home integration. Labor represents 30-40% of total cost, more if extensive carpentry or electrical work is needed.
High-end installations ($50,000-$150,000+) feature custom seating, comprehensive acoustic design, commercial-grade projection systems, multi-zone audio distribution, and sophisticated automation controlling lighting, HVAC, and window treatments alongside AV equipment. These projects often require structural modifications, dedicated HVAC for equipment heat load, and may involve architects or interior designers.
Labor rates vary by region and certification level. Expect $75-$150 per hour for certified installers in most markets. Complex calibration or programming work commands premium rates. Some builders charge flat project fees rather than hourly rates, this reduces uncertainty but requires detailed scopes to avoid change order disputes.
Budget an additional 10-15% contingency for unforeseen issues. Opening walls might reveal inadequate blocking for heavy equipment mounts. Existing electrical panels may lack capacity for new circuits, requiring service upgrades. Material prices fluctuate, lumber for acoustic framing, copper wire, and electronics all saw volatility in recent years.
DIY Home Theater Building: When It Makes Sense
Competent DIYers can handle many theater components if they’re comfortable with moderate electrical and carpentry work. Surface-mounted speakers, pre-terminated cables, and plug-and-play receivers require no specialized tools beyond a stud finder and drill. Wall-mounting flat panels or screens uses similar techniques to hanging heavy mirrors or cabinets, lag bolts into studs, level work, and proper weight ratings.
Running speaker wire through unfinished basements or attics is straightforward. Use CL2 or CL3 rated cable for in-wall runs, stapling it to joists every 16 inches while maintaining separation from electrical wiring. Color-code or label both ends before pulling, untangling eight speaker runs behind a finished wall wastes hours. A fish tape helps navigate insulated cavities, though wireless rear speakers eliminate this step entirely for surround channels.
Acoustic treatments don’t require professional installation. DIY absorption panels use Roxul Safe’n’Sound or Owens Corning 703 insulation wrapped in acoustically transparent fabric, mounted with impaling clips. Bass traps fit room corners using similar construction. Homeowners with basic sewing skills can build panels for $15-$25 each versus $100+ commercial equivalents. Resources like those found on Digital Trends provide current reviews of DIY-friendly acoustic products and installation techniques.
Know where DIY stops making sense. Ceiling-mounted projectors over 30 pounds should attach to solid blocking between joists, if that blocking doesn’t exist, installing it means opening the ceiling. Electrical work beyond replacing devices requires permits in most jurisdictions. Running new circuits from the panel, installing recessed lighting, or adding dedicated lines for amplifiers falls under licensed electrician territory unless local codes permit homeowner electrical work.
System calibration represents the biggest DIY challenge. While auto-calibration helps, understanding manual adjustments improves results. Invest in an SPL meter ($30-$50) and learn basic test tone procedures. Advanced video calibration requires colorimeters ($200+) and software knowledge that most homeowners won’t use beyond this single project, this step might warrant hiring a specialist for a few hundred dollars rather than purchasing equipment. For those interested in broader home media solutions, understanding DIY media server setups can complement a home theater by providing centralized content management alongside the viewing experience.
Safety considerations apply regardless of skill level. Wear eye protection when drilling overhead, drywall dust and wood chips fall directly toward your face. Use proper ladder stabilization for ceiling work. Turn off circuits at the breaker before working near electrical boxes. Heavy equipment requires two people for safe mounting, a 75-pound projector or 85-inch TV isn’t a solo job no matter how strong you are.